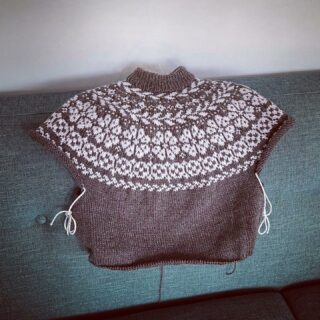
How To: Keep Those Yarn Cakes Tidy!
A DIY solution to keeping those center-pull yarn cakes organized while you knit or crochet! These easy to make "Skein Spanx" give your cakes the support they need to keep from collapsing and getting tangled as the yarn is pulled out from the center. The best part is that you probably have all of the materials you need in your home already!
My 8 year old daughter loves wearing skirts with tights. I have no idea why she loves wearing that combo so much since she also loves running around, playing on the playground, etc., which results in holes all over said tights pretty much immediately. I used to get really annoyed at this until I stumbled across advertisements for some yarn cozies by various talented crafters and my inner DIYer had an “Ah ha!” moment. I’ve also used a few of my own mid-calf length stockings and had equally fantastic results.
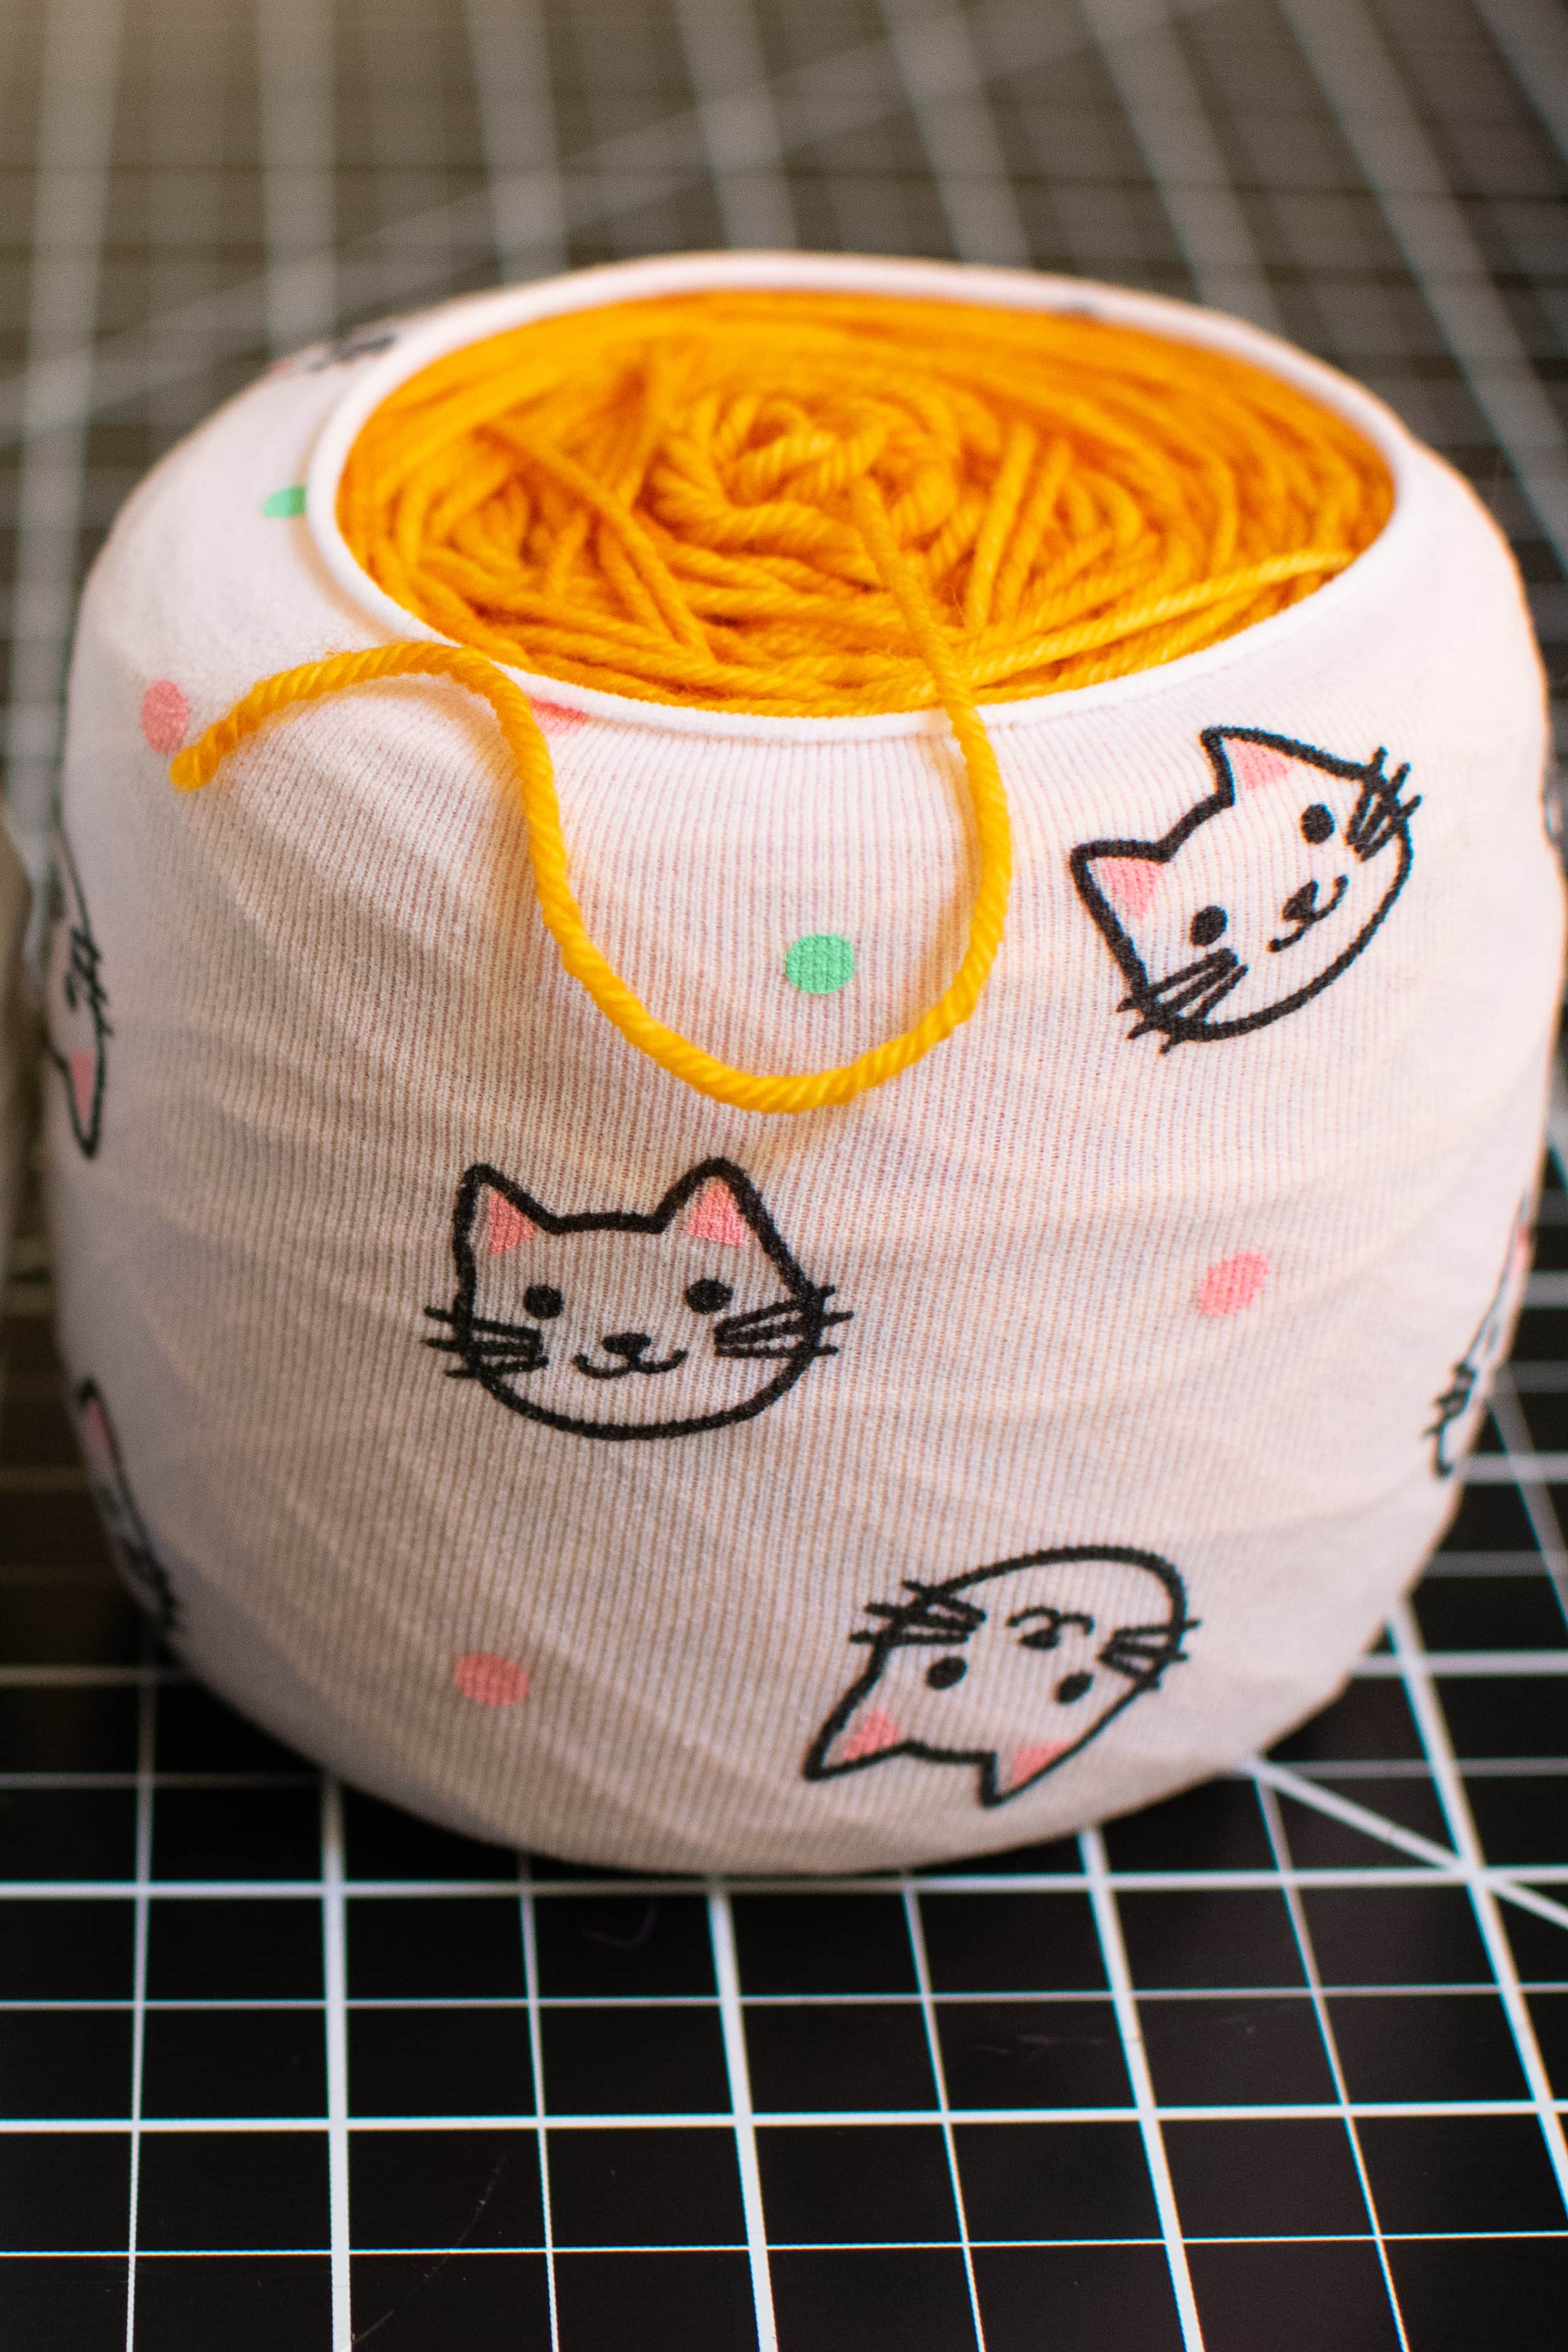
Skein Spanx, also called yarn cozies, skein coats, sheep squeezers, etc. by others, are stretchy tubes that wrap around yarn cakes and keep your yarn from collapsing in on itself and getting tangled when using the center-pull end of the yarn to knit with. Never again will you need to stop and re-cake your yarn throughout your project since your yarn cake never starts collapsing! By knitting from the center-pull end of the cake rather than the outer end, your yarn stays put while you knit instead of moving around, falling off tables/couches, and introducing unwanted twist to your yarn if it is unable to move.
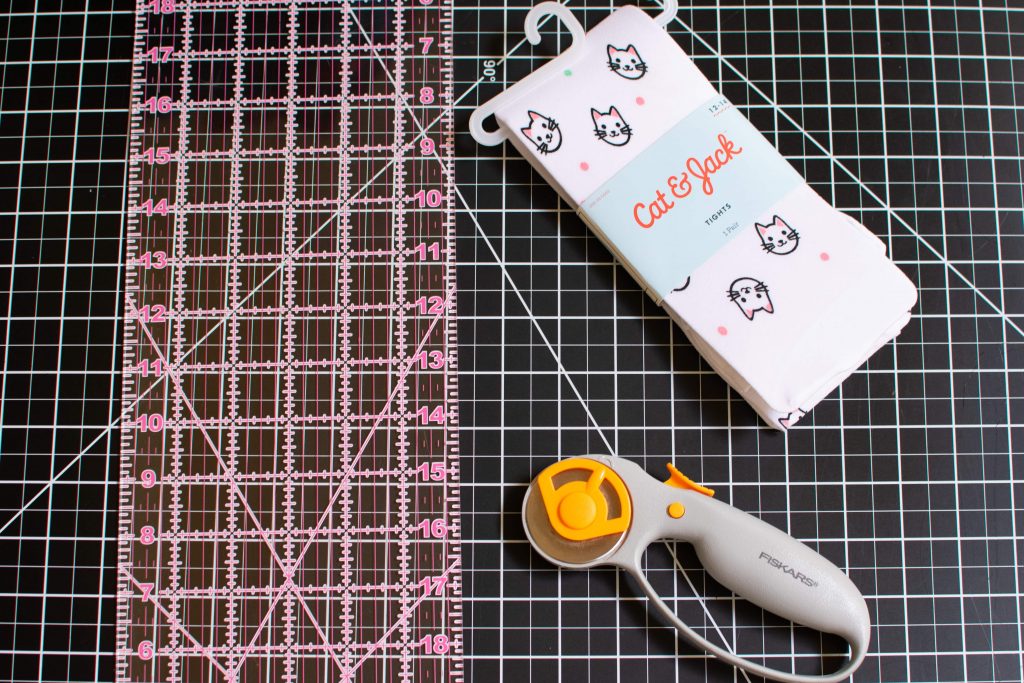
If you are planning on only making one pair of these Skein Spanx, all you really need is a pair of tights or stockings and something to cut them with. Optional tools that I find helpful include a cutting mat, rotary cutter instead of scissors, and a ruler. A rotary cutter works much better for this project because it leaves extremely clean and even edges. Using scissors, it is hard to avoid jagged edges along the cut edge unless you have very large and sharp scissors that can make the cut in a single stroke. A sewing machine becomes necessary if you want to make more than two Skein Spanx from a single pair of tights/stockings.
For this tutorial, I am using a self-healing cutting mat, rotary cutters, a 6″ wide quilting ruler, and a pair of adorable cat print tights from Target ($3.99). My daughter DID have a pair of these, but they were way too stained and gross for me to repurpose once she handed them over. I bought the largest size they had so the legs of the tights would be longer, enabling me to make more Skein Spanx from a single pair.
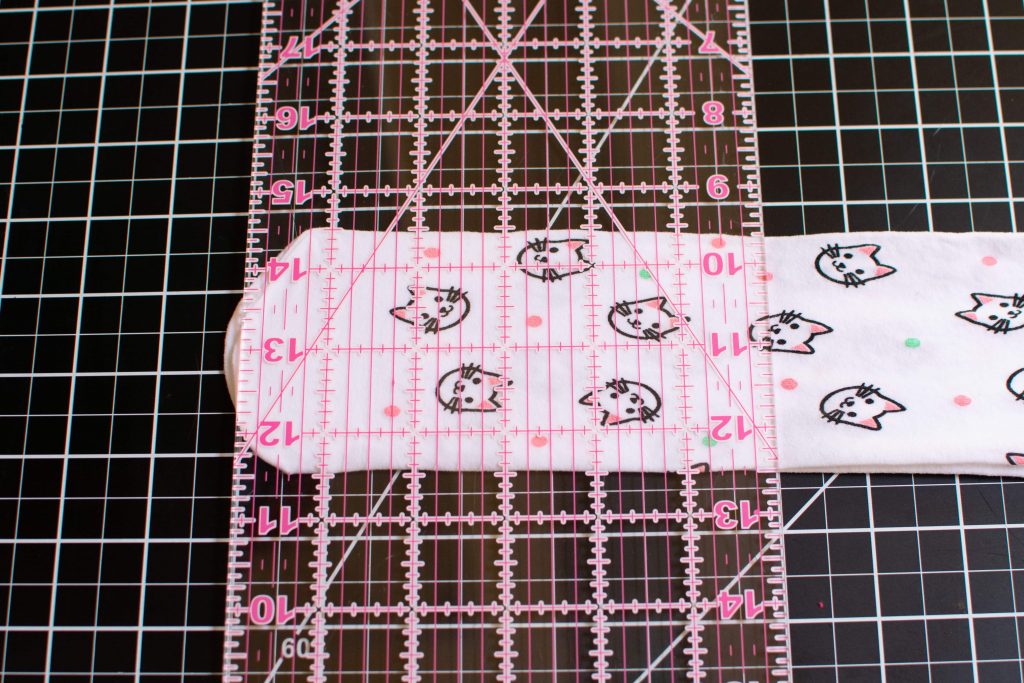
Remove the packaging from your tights/stockings if necessary. Lay one foot over the other so they mirror one another, folding it in half if it is a waist length pair. This project is extremely forgiving and you can simply cut straight across at roughly whatever length you want your Skein Spanx to be and call it good if you aren’t a perfectionist. That is exactly what I did for my first one to see if my idea would even work and it was totally fine other than having slightly jagged/crooked edges from my butcher job with the scissors. If the jagged and crooked edges bothers you as much as it does me, then I recommend laying the tights/stockings flat on your cutting mat like in the photo above and to use a ruler as a guide for your rotary cutter to cut a straight line at your measured length.
I prefer my Skein Spanx to be about 6″ (15.24 cm). This length has plenty of room for any sized skein of yarn. Seriously, I used them on a massive 250g skein of aran weight yarn (400 yds) without any trouble. I have used the exact same size to fit a 30g cake of fingering weight yarn by folding the top down over itself.
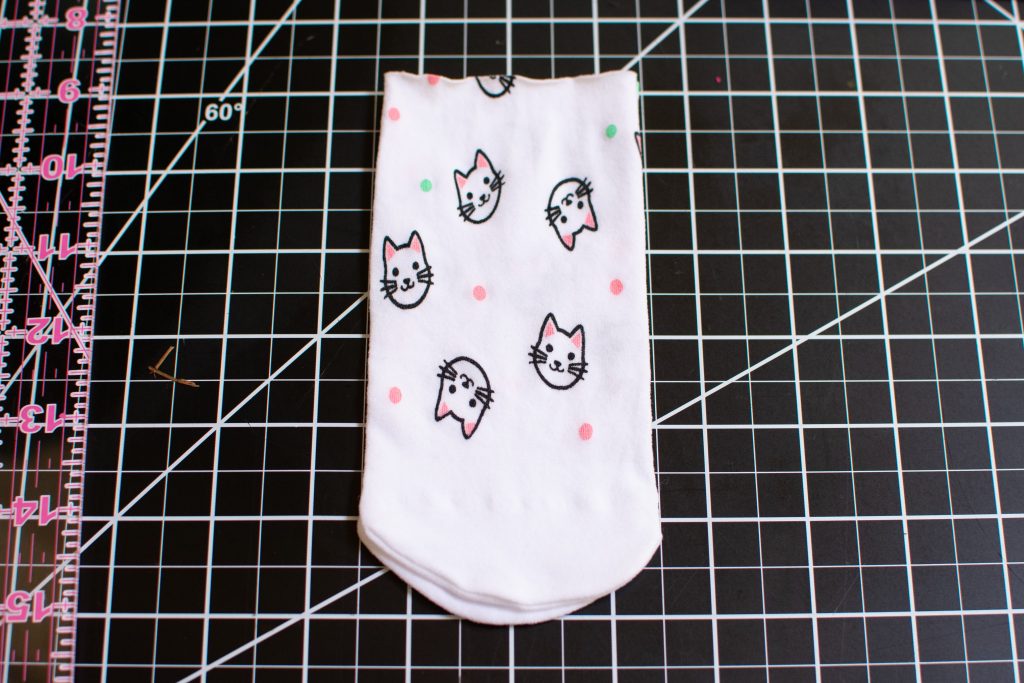
If you are making a single pair from whatever tights/stockings you are repurposing, then congratulations! You are finished! This process took about 30 seconds to transform the previously mentioned 8 year old’s hole-filled tights into something that continues to be useful. Are you using tights or stockings that are not full of holes and can be turned into several more Skein Spanx? Did you use a pair of mid-calf length stockings and are wondering how you can use the top part? Then continue reading!
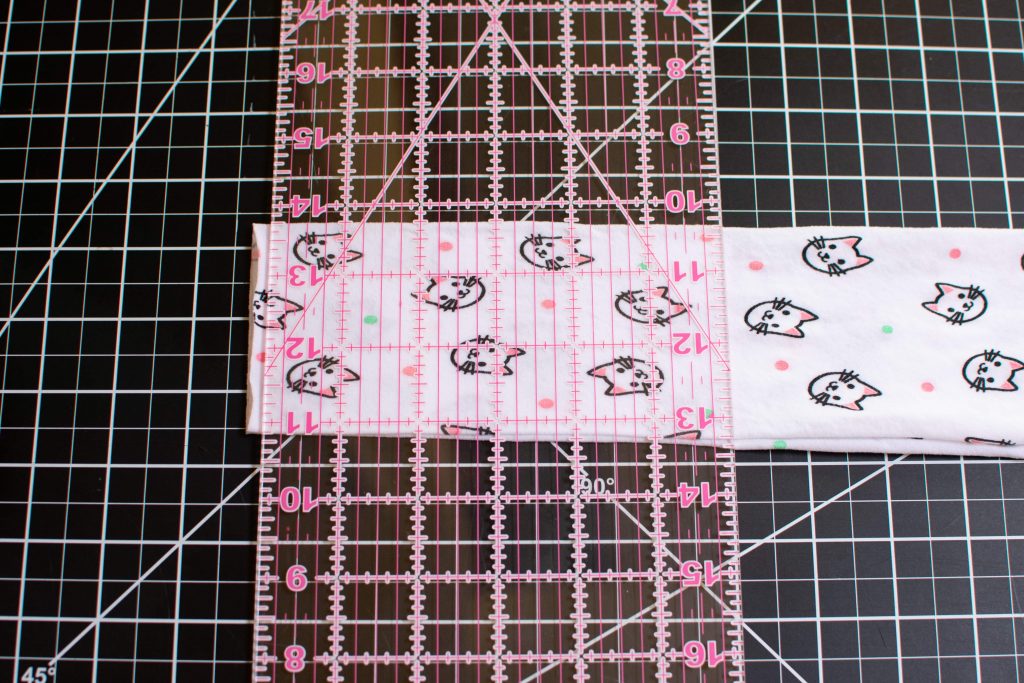
If you are using a pair of the full length over-the-hip type tights/stockings, continue cutting straight lines ever 6.25″ (15.9cm) or so. The extra length here is your seam allowance since you will need to sew one end of the tubes closed. Repeat this however many times you can down the length of your tights. If you are using a pair of mid-calf length stockings and wondering what to do with the top half, treat it exactly like I do the tubes in the following sections and sew the cut side.
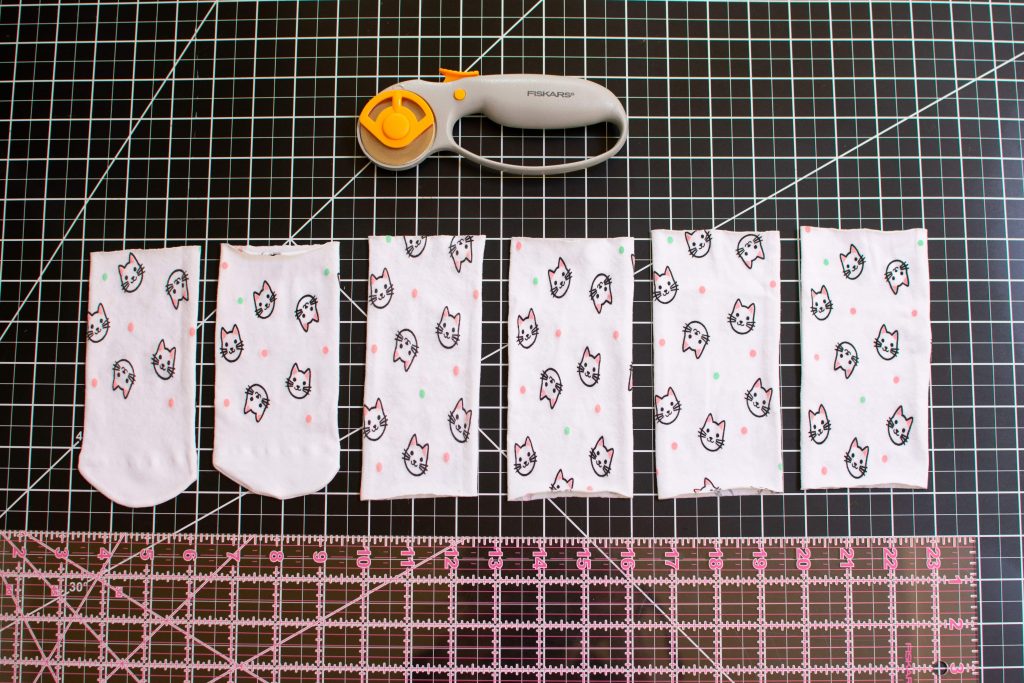
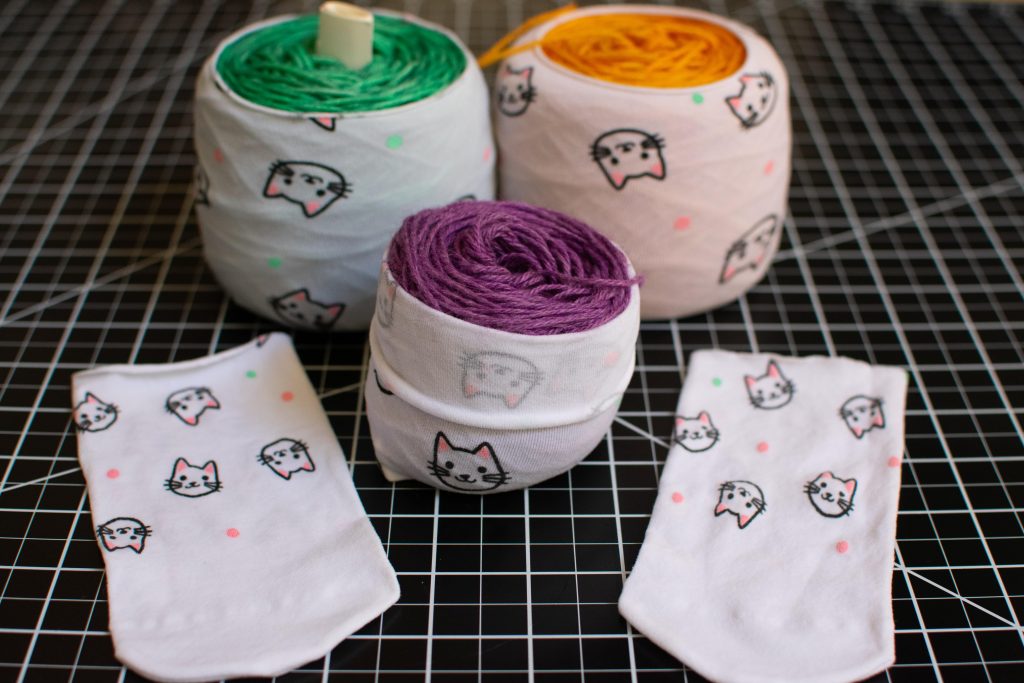
From this one pair of girls size 14/16 tights, I was able to cut enough pieces for 6 full sized Skein Spanx. I was also able to cut another pair of 5″ (12.7cm) tubes (not pictured) from the very top that would create a shorter set that would definitely still work on smaller yarn cakes. While you can technically leave the tubes as is and it *will* keep your yarn tidy, I like to sew one end closed to mimic the foot portion of the tights. The enclosed bottom keeps your yarn clean and protected from whatever surface it is set on while in use, as well as from any other objects that get tossed into your project bag.
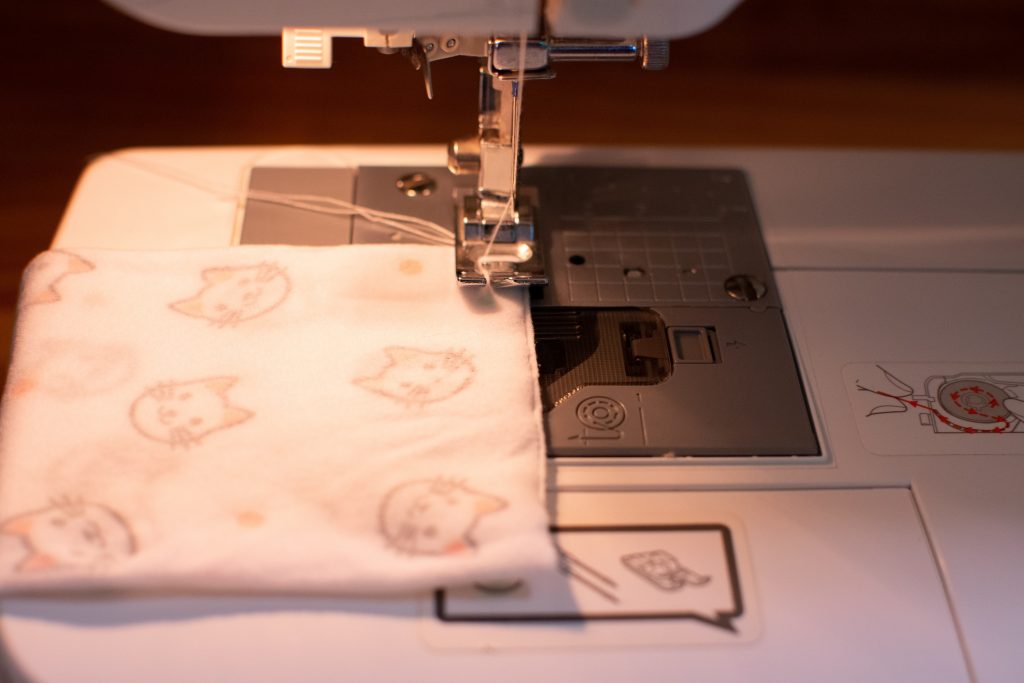
Turn the tubes inside out so the right sides are together. Line up the edges as close as possible without getting too worked up about it. They do have a tendency to curl a bit, so don’t stress about making it perfect. That coming from a slightly crazy perfectionist should tell you that this isn’t a project greatly impacted by imperfections. Set your machine to a zig-zag stitch as wide as it will go, with a medium stitch length. A zig-zag stitch secures the edges together while remaining as stretchy as the fabric is intended to be. This helps the Skein Spanx stretch to any sized yarn cake.
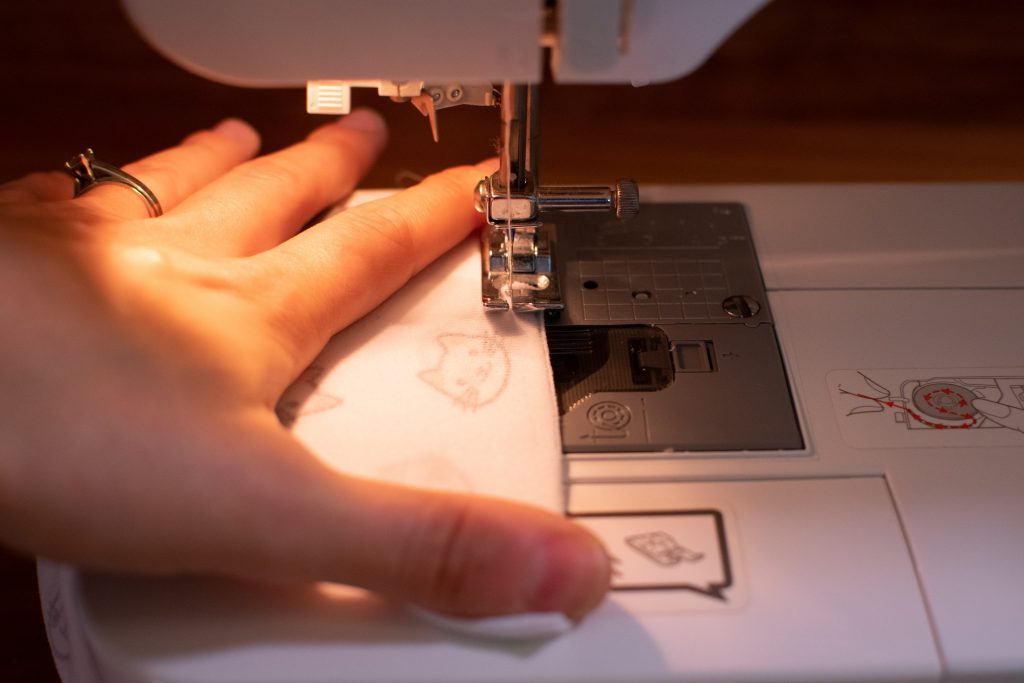
Always start and end with a reverse stitch to help lock your seam in place. Be sure to stretch the fabric a bit while you are sewing to help it retain as much of its stretchiness as possible. I am definitely not an expert seamstress and really struggled at the top edge with the fabric getting stuck and the stitches overlapping into a little heap. I think that happens because the fabric is so stretchy that it doesn’t move with the fabric your hand is trying to slide. Don’t panic if this happens to you! Stop sewing, lift the machine foot and move the fabric up a little to get past the “bump” created by the overlapping stitches. To keep this from happening, I started with fairly long thread tails trailing from the top that I could pull after the initial reverse stitches to help get that tricky top section to move under the foot as it should. Once you get past the top corner, you will be able to hold either side of the edges to stretch the fabric and move it along like in the photo above.
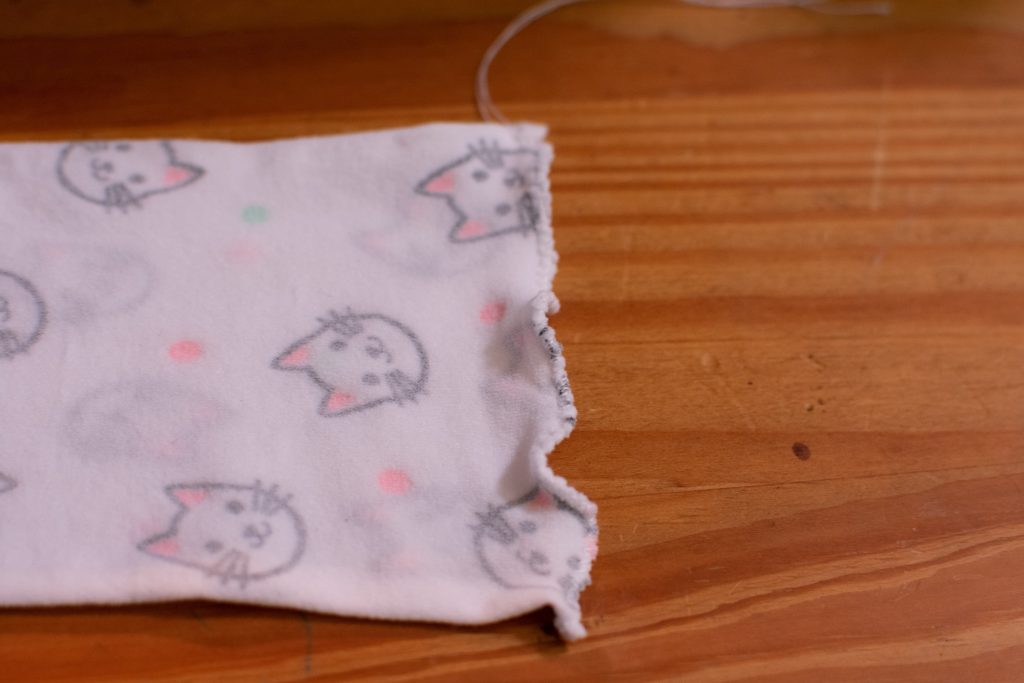
The finished seam should look something like the one in the image above. It is nowhere close to perfect and looks stretched out and wavy, but this doesn’t show up at all after turning the Skein Spanx right side out and putting it on a yarn cake. This is a good time to stick your hand in the open side of the tube and stretch it a bit to make sure you got both sides of the fabric in the seam all the way across. If there are any holes or weak spots, go back over those areas with the zig-zag stitch, remembering to reverse on each side of the “patch” to secure the new seam. I have definitely had to do that on more than one occasion and you cannot tell on the finished product.
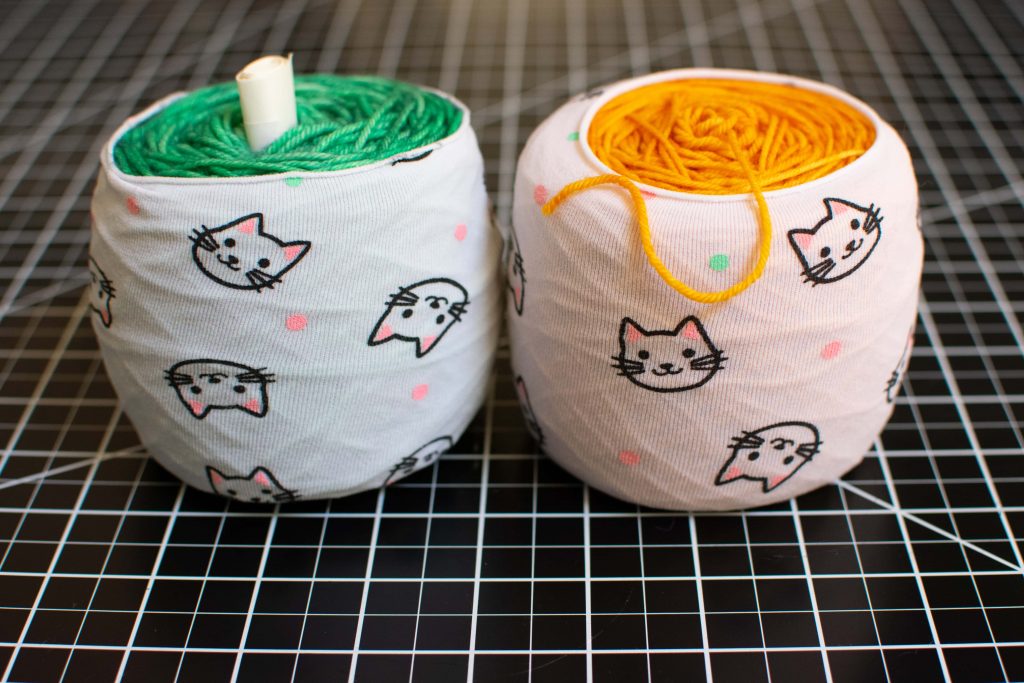
Hooray, we’re all done! Turn them right side out and they are good to go! The way that I like to put the Skein Spanx on my yarn cakes is to turn the yarn cake upside down so the bottom is facing up, then stretch the Skein Spanx out while centering it over the yarn cake and sliding the stretched Skein Spanx down over the yarn cake (similar to putting tights on a child’s foot). If the Skein Spanx is taller than your yarn cake, you can either fold the top down until the top edge is even with your yarn cake, or leave it hanging over the top of the cake. Your working yarn will still be able to move freely and the top of your yarn is kept clean and protected as well!
To remove it from the yarn cake, simply start peeling the top down the sides of the yarn cake while pushing the yarn cake up from the bottom. I do not recommend removing a Skein Spanx from a yarn cake that has already had some yarn removed from the center. Instead, wind the partial yarn cake into a new cake using the center-pull end of the yarn while your Skein Spanx keeps the partial cake organized and untangled during the winding.
As always, let me know if you have any questions! I would love to see your finished Skein Spanx on Instagram, so feel free to tag me @craftslayerpdx or use #skeinspanx.